

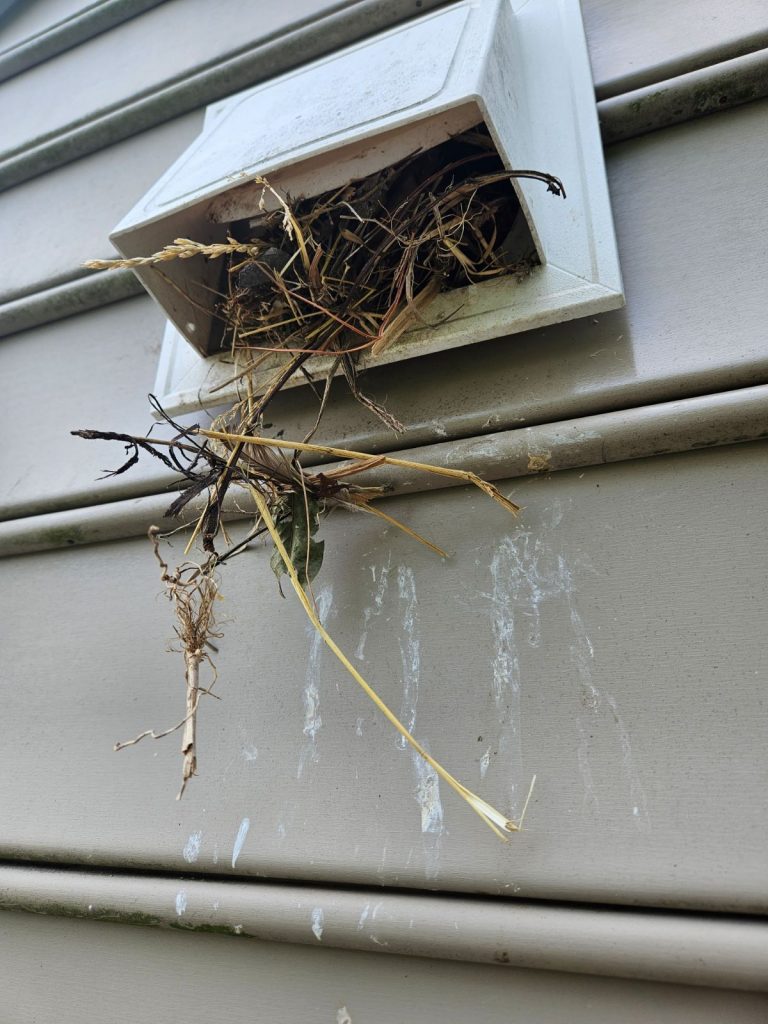
Quick answer: Pests enter homes through gaps smaller than a quarter-inch, including cracks in foundations, unsealed utility penetrations, and deteriorated weatherstripping. Homeowners can block these entry points using caulk, steel wool, expanding foam, and door sweeps—most repairs cost under $50 and take less than a weekend to complete.
A mouse can squeeze through a gap the size of a dime. Ants need even less space—sometimes just a hairline crack in a foundation wall. For homeowners dealing with recurring pest problems, the real issue often isn’t the pests themselves but the dozens of tiny openings that invite them inside.
Sealing these entry points is one of the most effective, low-cost strategies for long-term pest control. Unlike traps or chemical treatments that address pests after they’ve arrived, sealing prevents the problem before it starts. This guide walks through exactly where to look, what tools to use, and how to seal the three most common entry points: cracks and gaps, pipe penetrations, and worn weatherstripping.
Why Sealing Entry Points Matters More Than Pest Traps
Pest control companies often treat symptoms rather than causes. Spraying for ants or setting mouse traps can reduce an existing infestation, but if the entry points stay open, new pests will keep finding their way in.
Sealing gaps and cracks offers a few distinct advantages:
- It’s a one-time fix. Unlike bait stations or sprays that require reapplication, a properly sealed gap stays sealed for years.
- It works against multiple pest types. The same crack that lets in ants can also let in spiders, mice, and even snakes in some regions.
- It improves energy efficiency. Gaps around pipes and worn weatherstripping don’t just let pests in—they let conditioned air out, raising utility bills.
Choose sealing as a first-line defense if you’re dealing with recurring small pests like ants, spiders, or rodents. For active infestations involving termites, carpenter ants, or larger wildlife, pair sealing efforts with professional pest control.
How Do You Find Pest Entry Points Around Your Home?
Most pest entry points cluster around a handful of predictable locations. A thorough inspection should cover the following areas:
- Foundation walls, especially where they meet siding or brick veneer
- Utility penetrations, including spots where pipes, wires, and cables enter the house
- Around windows and doors, particularly at the corners and along the bottom edge
- Roofline and soffits, where gaps can develop from wood rot or settling
- Dryer vents and crawl space openings
A practical trick for finding smaller gaps: inspect your home’s exterior at dusk with a flashlight shining from inside. Any light visible from outside marks a gap worth sealing.
How to Seal Cracks and Gaps in Your Foundation
Foundation cracks are among the most common entry points for ants, spiders, and occasionally rodents. The repair method depends on the size and location of the crack.
Step 1: Clean the Area
Remove loose debris, old caulk, or dirt from the crack using a wire brush. A clean surface helps sealant adhere properly.
Step 2: Choose the Right Material
| Crack Size | Recommended Material | Notes |
|---|---|---|
| Hairline (under 1/8 inch) | Silicone or acrylic latex caulk | Flexible, paintable, weather-resistant |
| Small to medium (1/8–1/2 inch) | Expanding foam sealant | Good for gaps around pipes or uneven openings |
| Larger structural cracks (over 1/2 inch) | Hydraulic cement or mortar patch | May indicate a structural issue—consider a professional assessment |
Step 3: Apply and Smooth
Use a caulking gun for precision, applying steady pressure as you move along the crack. Smooth the bead with a putty knife or a gloved finger for a clean finish.
Choose expanding foam if the gap is irregular in shape or depth—it fills voids that caulk can’t reach. Choose caulk for straight, narrow cracks where flexibility matters, such as areas prone to seasonal expansion and contraction.
How to Seal Gaps Around Pipes and Utility Lines
Utility penetrations are a frequent blind spot. Pipes for water, gas, and HVAC systems, along with electrical conduits and cable lines, all require holes through exterior walls—and installers don’t always seal them tightly.
Step 1: Identify the Gap Size
Small gaps (under half an inch) can usually be handled with caulk alone. Larger gaps need a combination approach.
Step 2: Pack with Steel Wool for Rodent-Prone Areas
For gaps where mice or rats are a concern, pack coarse steel wool tightly into the opening before sealing. Rodents cannot chew through steel wool, making it an effective first barrier.
Step 3: Seal with Expanding Foam or Caulk
Apply expanding foam over the steel wool for a weatherproof finish, or use caulk for smaller, cleaner gaps. Copper mesh is a suitable alternative to steel wool in areas exposed to consistent moisture, since steel wool can rust over time.
Step 4: Check Dryer Vents and HVAC Line Sets
These larger openings often have loose-fitting covers. Confirm that vent flaps close properly and that any gaps around the housing are sealed with exterior-grade caulk.
How to Fix Worn Weatherstripping Around Doors and Windows
Weatherstripping degrades over time due to UV exposure, temperature changes, and regular use. Once it cracks or compresses, it leaves gaps large enough for insects and even small rodents to pass through.
Signs Weatherstripping Needs Replacing
- Visible daylight around a closed door
- A noticeable draft near windows or doors
- Stripping that feels brittle, cracked, or flattened
Step 1: Remove the Old Weatherstripping
Pull away the damaged material, cleaning off any adhesive residue left behind.
Step 2: Measure and Select Replacement Material
Weatherstripping comes in several forms: adhesive-backed foam, V-strip (tension seal), and door sweeps for the bottom of doors.
| Weatherstripping Type | Best Use Case | Average Lifespan |
|---|---|---|
| Adhesive foam tape | Window sashes, small gaps | 1–2 years |
| V-strip (tension seal) | Door and window frames | 5–10 years |
| Door sweep | Bottom of exterior doors | 3–5 years |
Step 3: Install and Test
Apply the new weatherstripping according to the product’s instructions, then close the door or window to confirm a snug fit without excessive resistance.
For doors with persistent gaps at the bottom, a door sweep paired with a threshold seal offers the most complete barrier against crawling insects.
When Should You Call a Pest Control Professional?
Sealing entry points resolves most minor pest issues, but certain situations call for expert help:
- Active termite activity, indicated by mud tubes or hollow-sounding wood
- Existing rodent infestations, where sealing alone won’t remove pests already inside
- Recurring large wildlife entry, such as raccoons or squirrels accessing attics
- Structural foundation cracks that may indicate settling or drainage issues
In these cases, sealing should be a complementary step rather than the sole solution.
Keep Pests Out for Good
A sealed home doesn’t happen with one afternoon of caulking—it requires a seasonal habit of inspection and maintenance. Check entry points each spring and fall, when temperature swings tend to reveal new gaps from expansion and contraction.
Start with the areas covered in this guide: foundation cracks, pipe penetrations, and weatherstripping. These three categories account for the vast majority of pest entry points in residential homes. A few hours of sealing now can save homeowners from months of dealing with unwanted houseguests later.
Frequently Asked Questions
How much does it cost to seal pest entry points in a home?
Most DIY sealing projects cost between $20 and $75, covering materials like caulk, expanding foam, steel wool, and weatherstripping. Professional pest-proofing services typically range from $200 to $500, depending on the home’s size and the extent of the gaps found.
How often should weatherstripping be replaced?
Adhesive foam weatherstripping typically lasts one to two years, while V-strip tension seals can last five to ten years. Inspect weatherstripping annually and replace it as soon as cracking, flattening, or drafts appear.
Can sealing entry points alone get rid of an existing pest infestation?
No. Sealing prevents new pests from entering but doesn’t remove pests already inside the home. Active infestations typically require traps, baits, or professional treatment alongside sealing efforts.
What’s the best material for sealing gaps around pipes?
Steel wool combined with expanding foam works well for pipe gaps, especially in rodent-prone areas. The steel wool blocks chewing, while the foam provides a weatherproof, insulating seal.
Is caulk or expanding foam better for sealing cracks?
Caulk works best for narrow, straight cracks that need flexibility, such as those prone to seasonal movement. Expanding foam suits larger or irregularly shaped gaps, including those around pipes and conduits.